浅析 NSTimer & CADisplayLink 内存泄漏
目录
偶得前言
本篇文章中我们主要谈谈NSTimer\CADisplayLink在使用过程中牵扯到内存泄漏的相关问题及解决思路(文章末尾会附上Demo),有时候我们在不知情的情况容易入坑,最关键你还不知道自己掉坑了,闲话不多说,让我们开始进入正题。
NSRunLoop与定时器
我们先来回顾一下NSRunLoop对NSTimer\CADisplayLink的影响。(为了方便,以下统称定时器)
大家都知道定时器的运行需要结合一个NSRunLoop(有疑惑的同学可以查看Xcode Document,此处不细说),同时NSRunLoop对该定时器会有一个强引用,这也是为什么我们不对NSRunLoop中的定时器进行强引的原因(如:self.timer = timer, 此代码可省略)。
- invalidate的作用
由于NSRunLoop对定时器有着牵引,那么问题就来了,那么定时器怎样才能被释放掉呢(先不考虑使用removeFromRunLoop:),此时- invalidate函数的作用就来了,我们来看看官方就此函数的介绍:
Removes the object from all runloop modes (releasing the receiver if it has been implicitly retained) and releases the ‘target’ object.
据官方介绍可知,- invalidate做了两件事,首先是把本身(定时器)从NSRunLoop中移除,然后就是释放对‘target’对象的强引用。从而解决定时器带来的内存泄漏问题。
内存泄漏在哪?
看到这里我们可能会有点懵逼,先上一个图(为了方便讲解,途中箭头指向谁就代表强引谁):
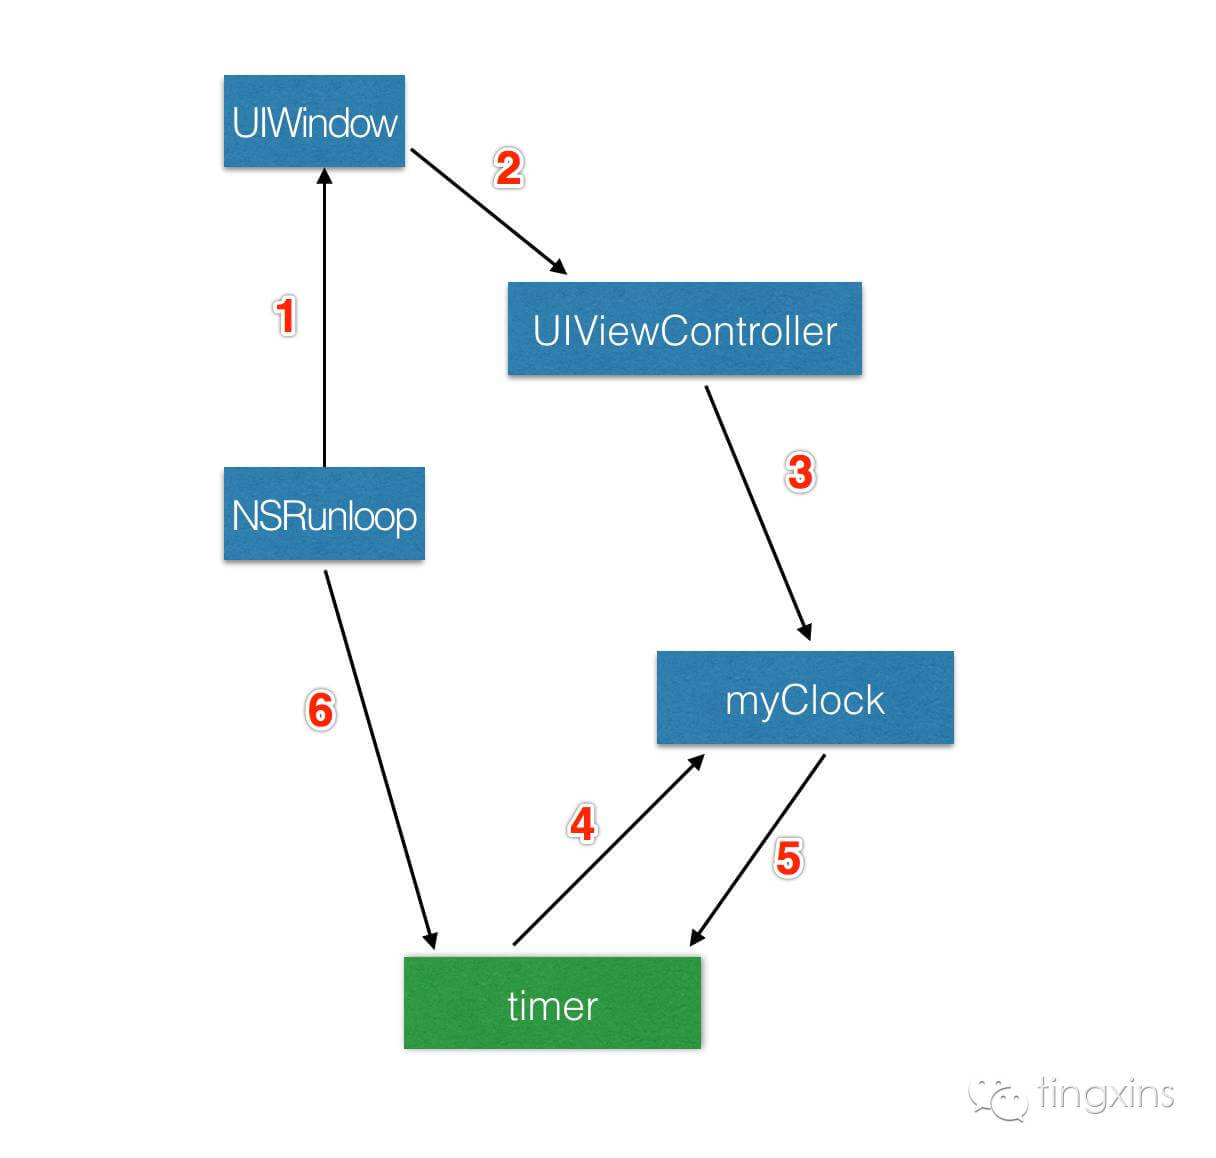
此处我们必须明确,在开发中,如果创建定时器只是简单的计时,不做其他引用,那么timer对象与myClock对象循环引用的问题就可以避免(即省略self.timer = timer,前文已经提到过,不再阐述),即图中箭头5可避免。
虽然孤岛问题已经避免了,但还是存在问题,因为myClock对象被UIViewController以及timer引用(timer直接被NSRunLoop强引用着),当UIViewController控制器被UIWindow释放后,myClock不会被销毁,从而导致内存泄漏。
讲到这里,有些人可能会说对timer对象发送一个invalidate消息,这样NSRunLoop即不会对timer进行强引,同时timer也会释放对myClock对象的强引,这样不就解决了吗?没错,内存泄漏是解决了。
但是,这并不是我们想要的结果,在开发中我们可能会遇到某些需求,只有在myClock对象要被释放时才去释放timer(此处要注意释放的先后顺序及释放条件),如果提前向timer发送了invalidate消息,那么myClock对象可能会因为timer被提前释放而导致数据错了,就像闹钟失去了秒针一样,就无法正常工作了。所以我们要做的是在向myClock对象发送dealloc消息前在给timer发送invalidate消息,从而避免本末倒置的问题。这种情况就像一个死循环(因为如果不给timer发送invalidate消息,myClock对象根本不会被销毁,dealloc方法根本不会执行),那么该怎么做呢?
我们如何解决?
现在我们已经知道内存泄漏在哪了,也知道原因是什么,那么如何解决,或者说怎样优雅的解决这问题呢?方式有很多.
a.NSTimer Target
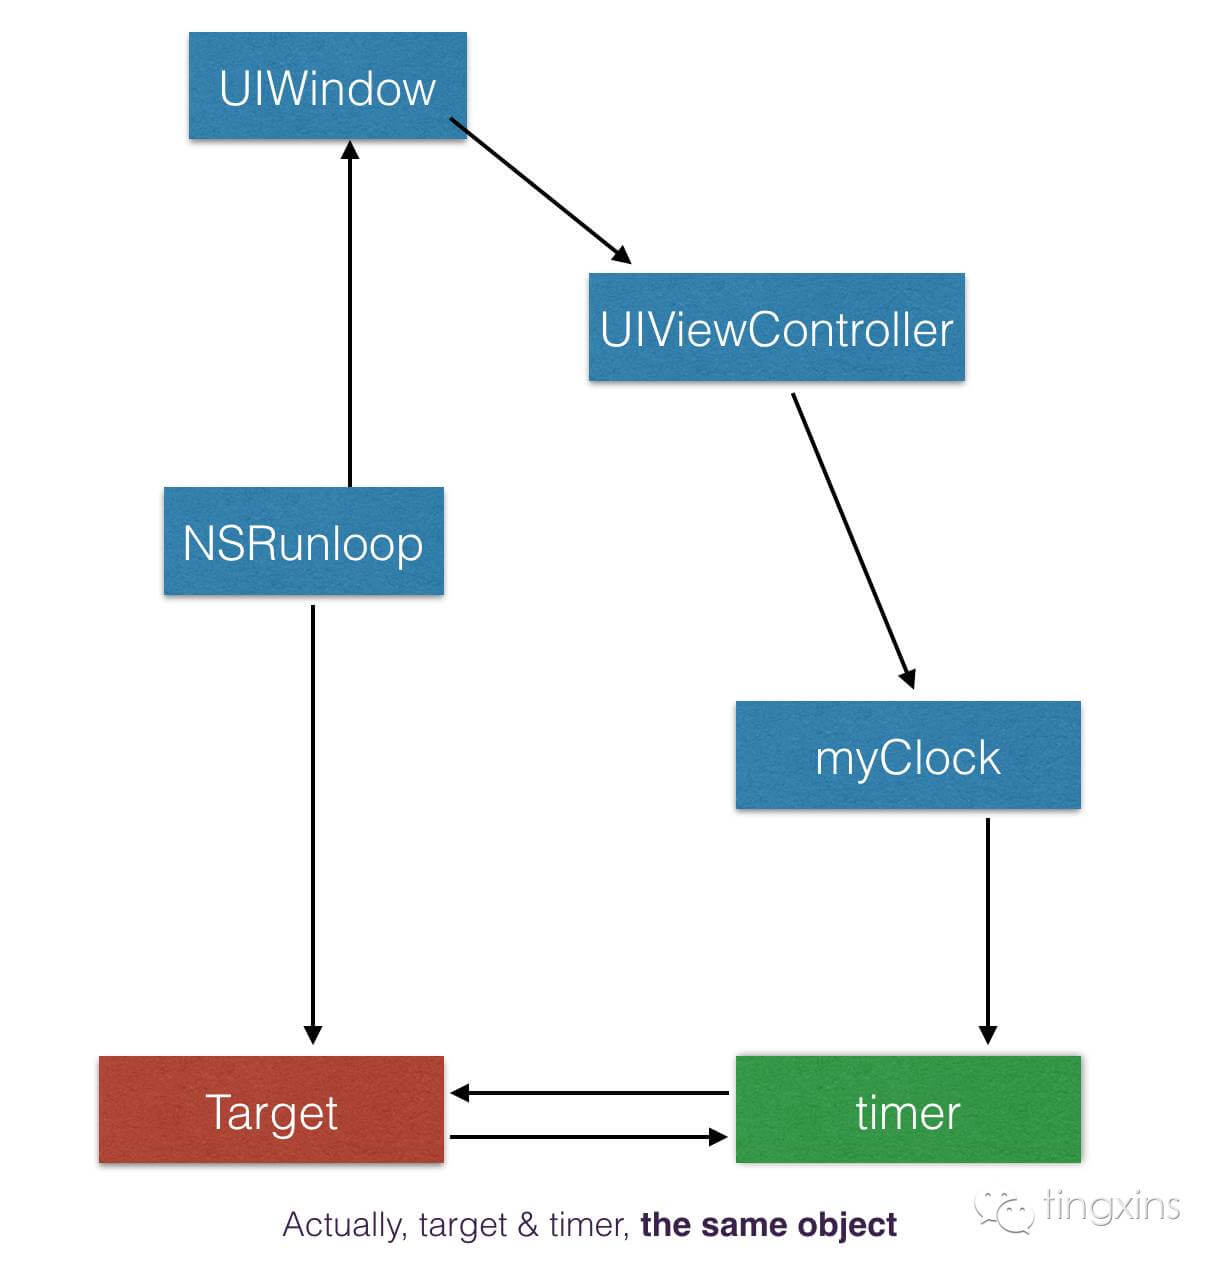
为了解决timer与myClock之间类似死锁的问题,我们会将定时器中的‘target’对象替换成定时器自己,采用分类实现。
#import "NSTimer+TXTimerTarget.h"

@implementation NSTimer (TXTimerTarget)

+ (NSTimer *)tx_scheduledTimerWithTimeInterval:(NSTimeInterval)interval repeat:(BOOL)yesOrNo block:(void (^)(NSTimer *))block{
    return [self scheduledTimerWithTimeInterval:interval target:self selector:@selector(startTimer:) userInfo:[block copy] repeats:yesOrNo];
}

+ (void)startTimer:(NSTimer *)timer {
    void (^block)(NSTimer *timer) = timer.userInfo;
    if (block) {
        block(timer);
    }
}
@end
b.NSTimer Proxy
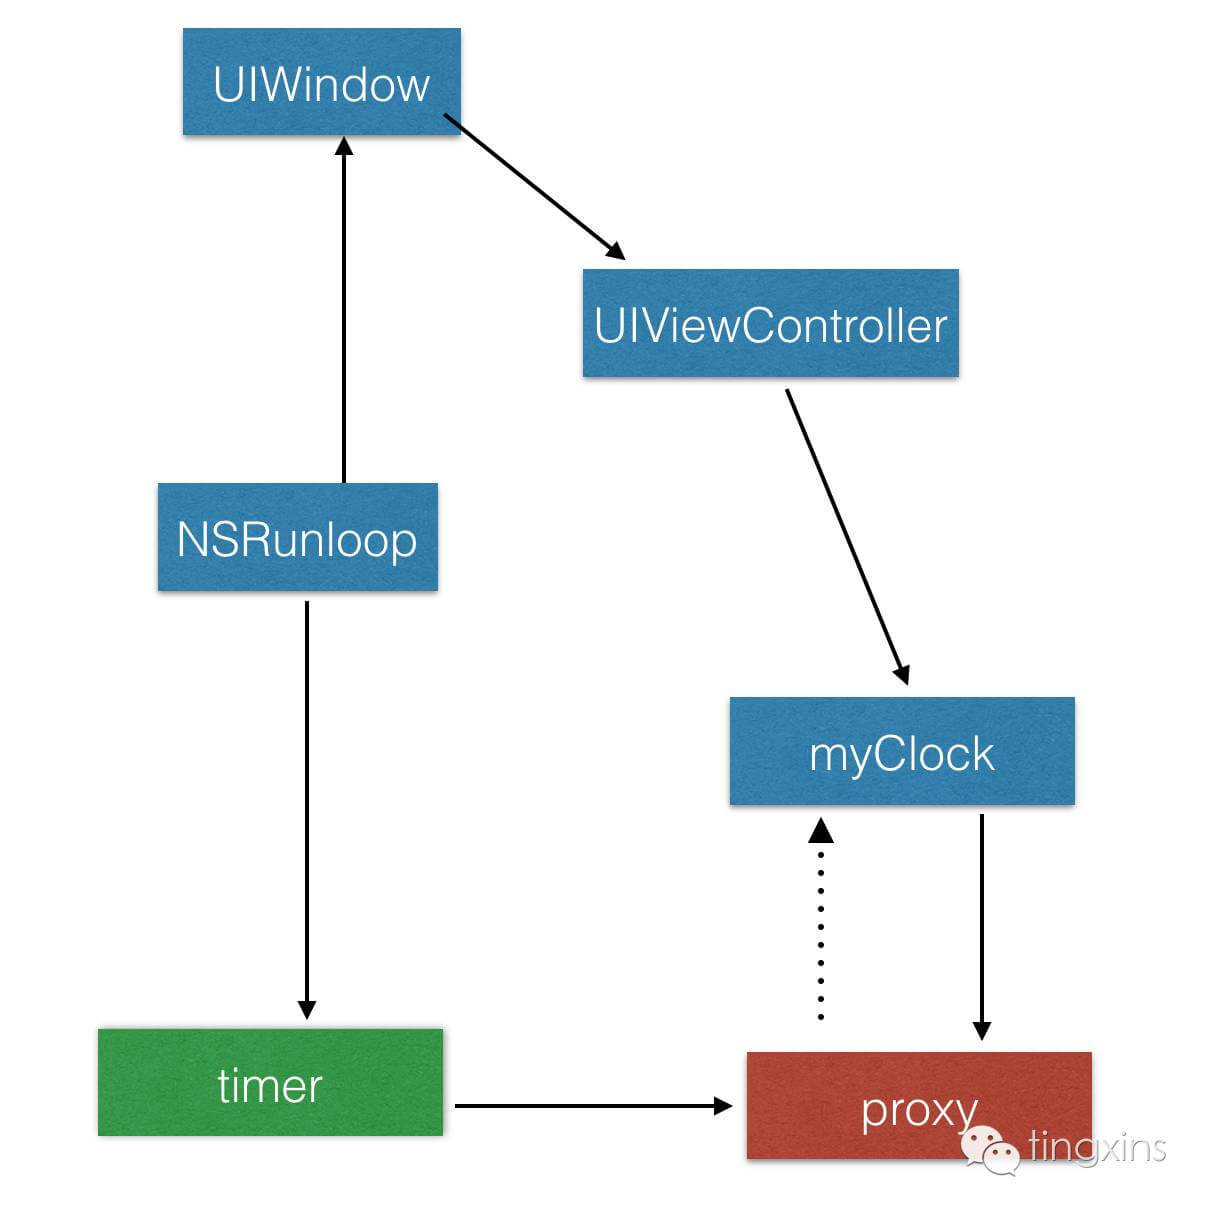
这种方式就是创建一个NSProxy子类TXTimerProxy(不太清楚NSProxy的同学可以去查一下相关资料哈),TXTimerProxy的作用是什么呢?就是什么也不做,可以说只会重载消息转发机制,如果创建一个TXTimerProxy对象将其作为timer的‘target’,专门用于转发timer消息至myClock对象,那么问题是不是就解决了呢?答案:是的。
NSTimer *timer = [NSTimer scheduledTimerWithTimeInterval:0.25 target:[TXTimerProxy timerProxyWithTarget:self] selector:@selector(startTimer) userInfo:nil repeats:YES];

[[NSRunLoop currentRunLoop] addTimer:timer forMode:NSRunLoopCommonModes];

self.timer = timer;
实现详情文章末尾会附上Demo,感兴趣的同学可以去看看哈,有什么问题可以直接问,互相交流。
c.NSTimer Block
还有一种方式就是采用Block,iOS 10增加的API。
+ scheduledTimerWithTimeInterval:repeats:block:
The execution body of the timer; the timer itself is passed as the parameter to this block when executed to aid in avoiding cyclical references
有点类似a方式,此处不再详述。
//NSTimer Block(解决self内存泄漏) 模拟器会崩溃
//API_AVAILABLE(macosx(10.12), ios(10.0), watchos(3.0), tvos(10.0));
NSTimer *timer = [NSTimer scheduledTimerWithTimeInterval:0.25 repeats:YES block:^(NSTimer * _Nonnull timer) {
    NSLog(@"TXNSTimerBlockController timer start");
}];

[[NSRunLoop mainRunLoop] addTimer:timer forMode:NSRunLoopCommonModes];
self.timer = timer;
此处以NSTimer举例,CADisplayLink不再详述(方式都是一样)。
以上纯属个人看法和观点,如有不妥或不对之处,请指出,互相交流,欢迎一起讨论,谢谢^_^。
TXTimerLeaksDemo链接:https://github.com/tingxins/TXTimerLeaksDemo
广告
欢迎关注微信公众号